This is an area that terrifies many potential podcasters. Who can afford to build a radio studio or music recording one in their spare room, garage or garden shed?
Here’s the good news: You DON”T need to.
Radio has specific requirements, highly sensitive mics, audio engineers, executive producers, in fact an entire structure around the sound coming out of the radio. The same is true for music recording studios. A separate mic for each instrument, a mixer board, recording gear and on and on.
Podcasting, with a few strategic choices, does not require a fancy schmancy set up.
Let me explain.
To podcast we need a good quality raw file, usually in .wav format. This file type is a rich medium, it contains much of the sound and lots of noise if not recorded with thought.
So picking a mic that records just what you want recorded and nothing, or very little of what you not. A shotgun mic makes sense. It points at the voice source, blocks out much of the background and there are lots of options at various prices. I’ve used a small portable shotgun mic: the Rode videomic me. Small and portable are the keys. This mic is works of a smartphone. I use Voice Recorder Pro, a free recording app despite the name which does the job well. The combination of the Rode and that app are my “mobile”, in the field option. I used it while travelling after improving a recording space.
What I use in my usual set up is a Zoom H2n audio recorder. This doubles as a mobile recorder as well. An improvement on the Zoom H2 it is a common tool for outside broadcast journalists gathering audio. It’s robust, has a huge number of customisable settings and can record on one side of the machine or both. I have it setup to record just on my side and we’ll get to why later.
So I go for robust, mobile devices with either a built in narrow arc of recording, the Rode, or one with more choices but still with a way to focus the recording pattern.
To the actual space I’m using now (June 2018).
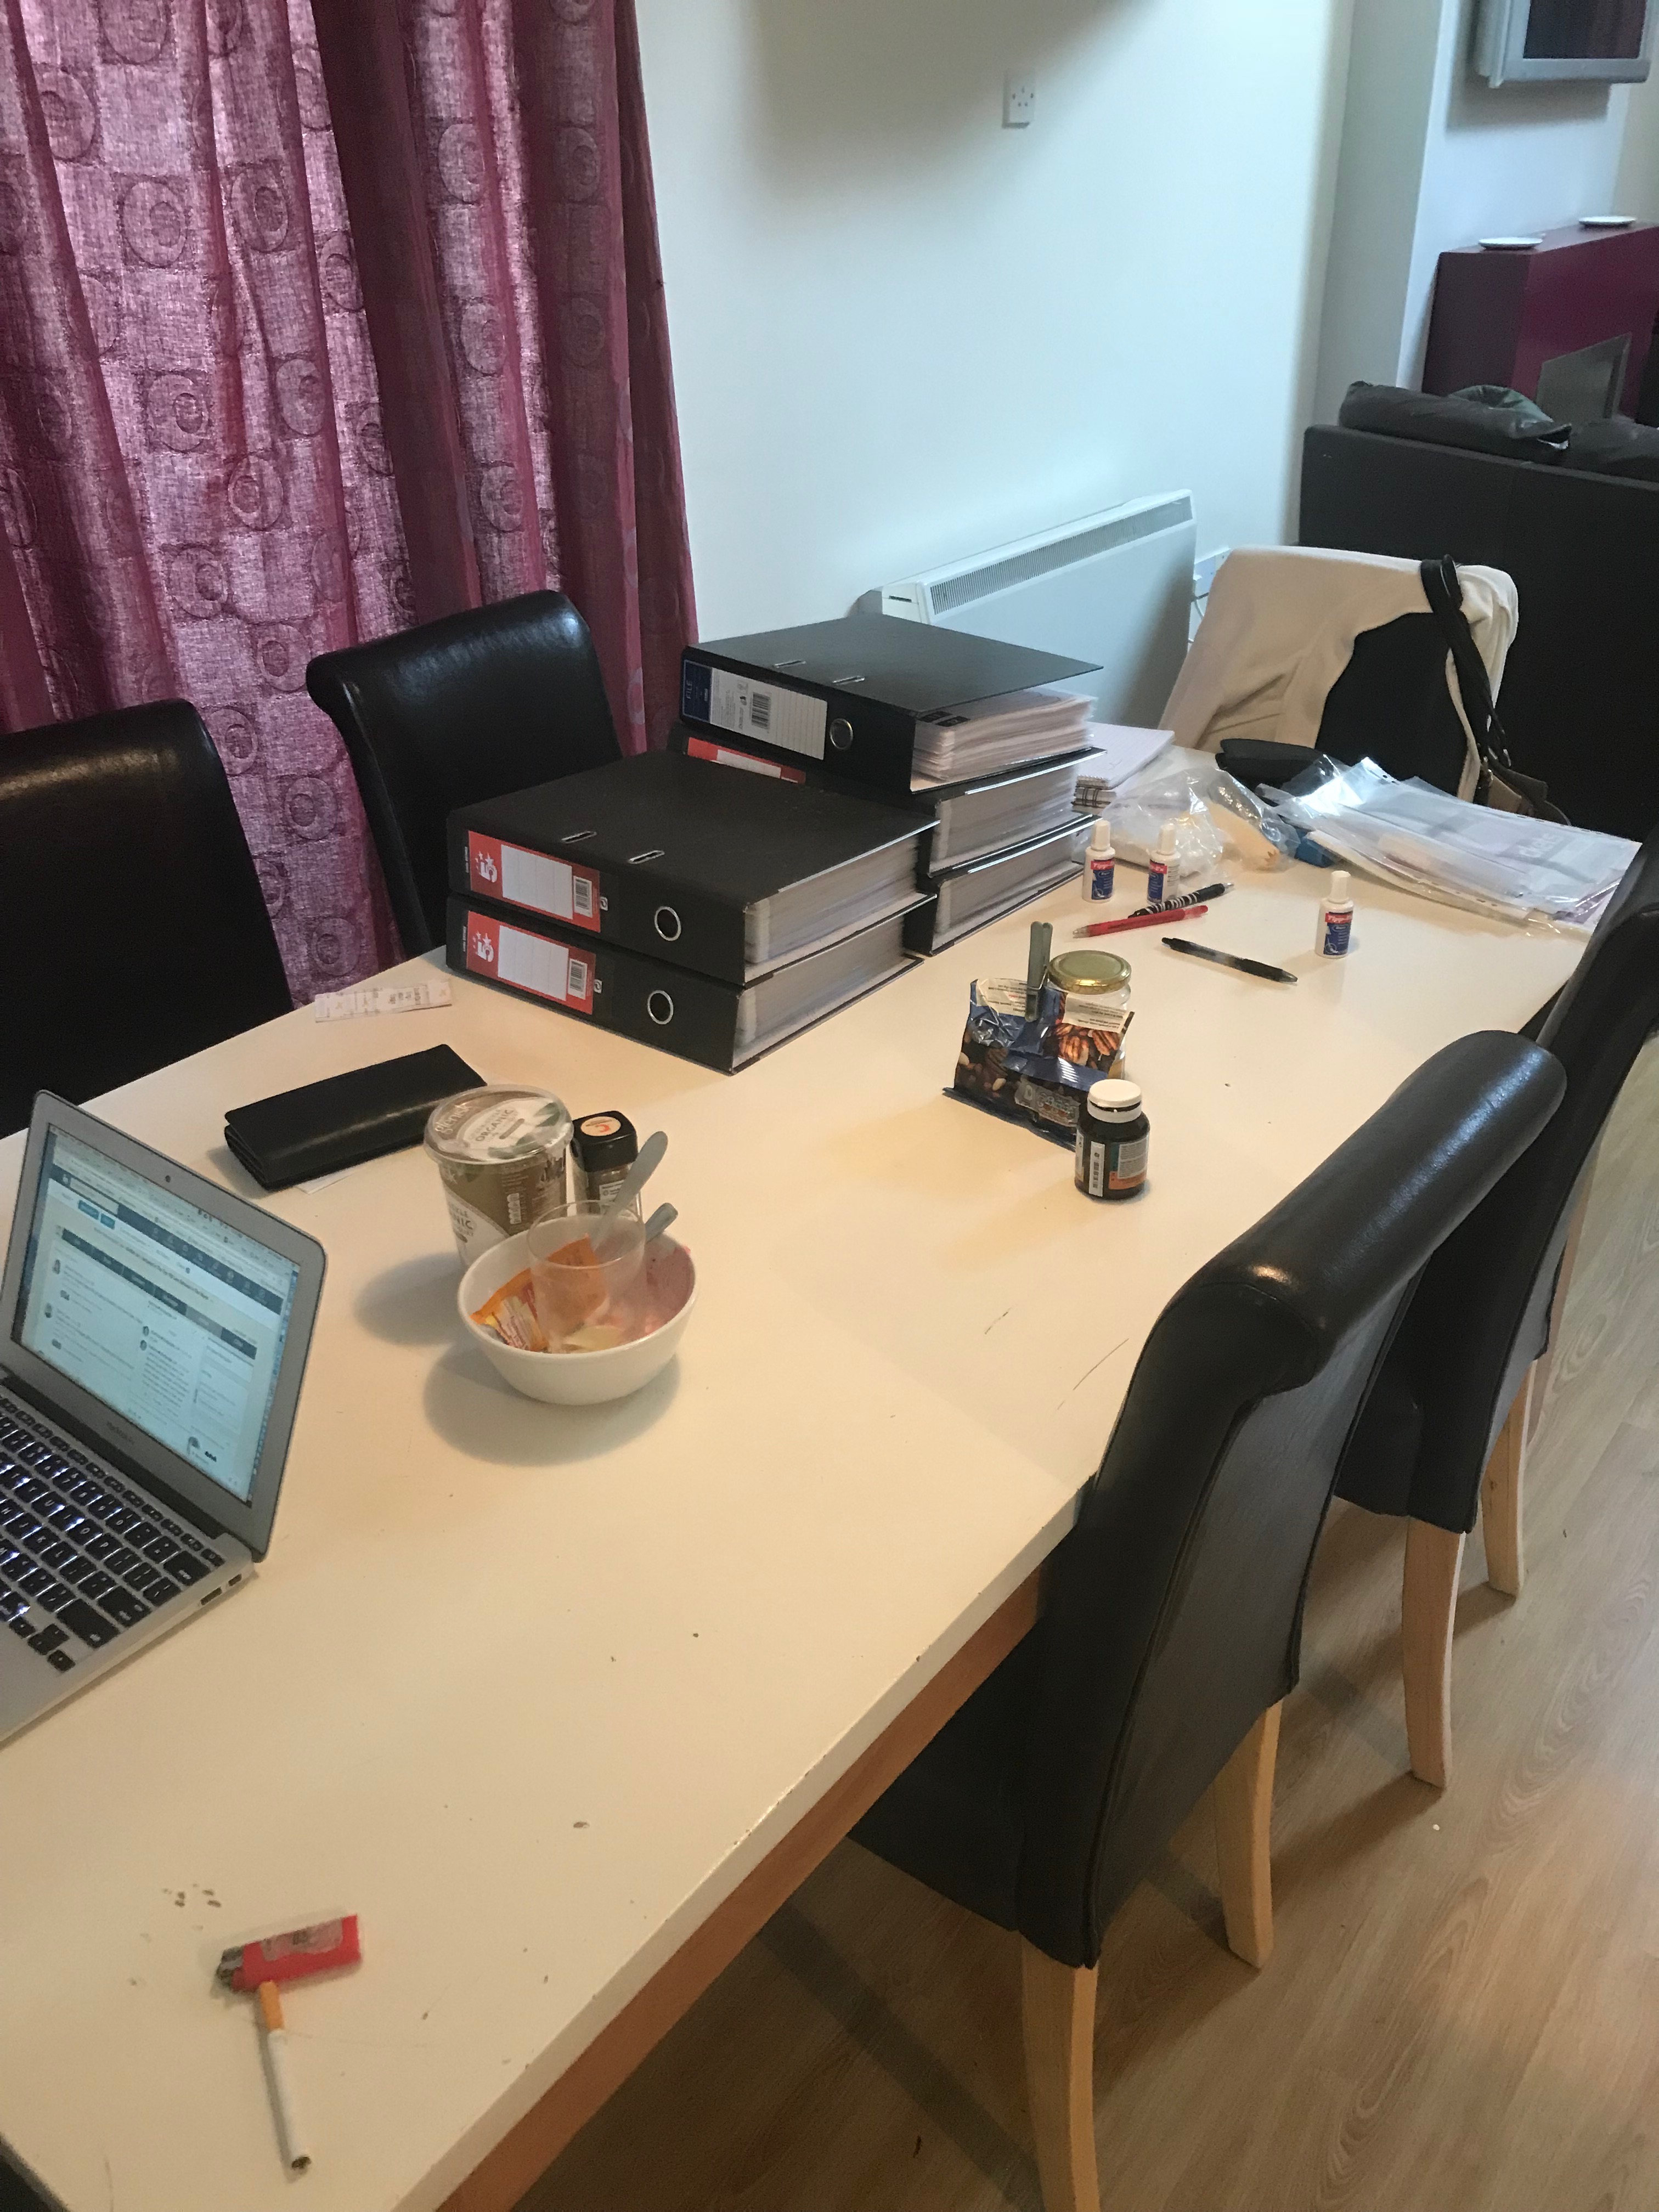
Here we see the kitchen table. Open space to the right, a hard wall beyond the thin curtains.
The open space to the right ends in hard walls.
So if I sit at the laptop as pictured, my voice would travel down the room, maybe bounce back or reflect of the side walls.
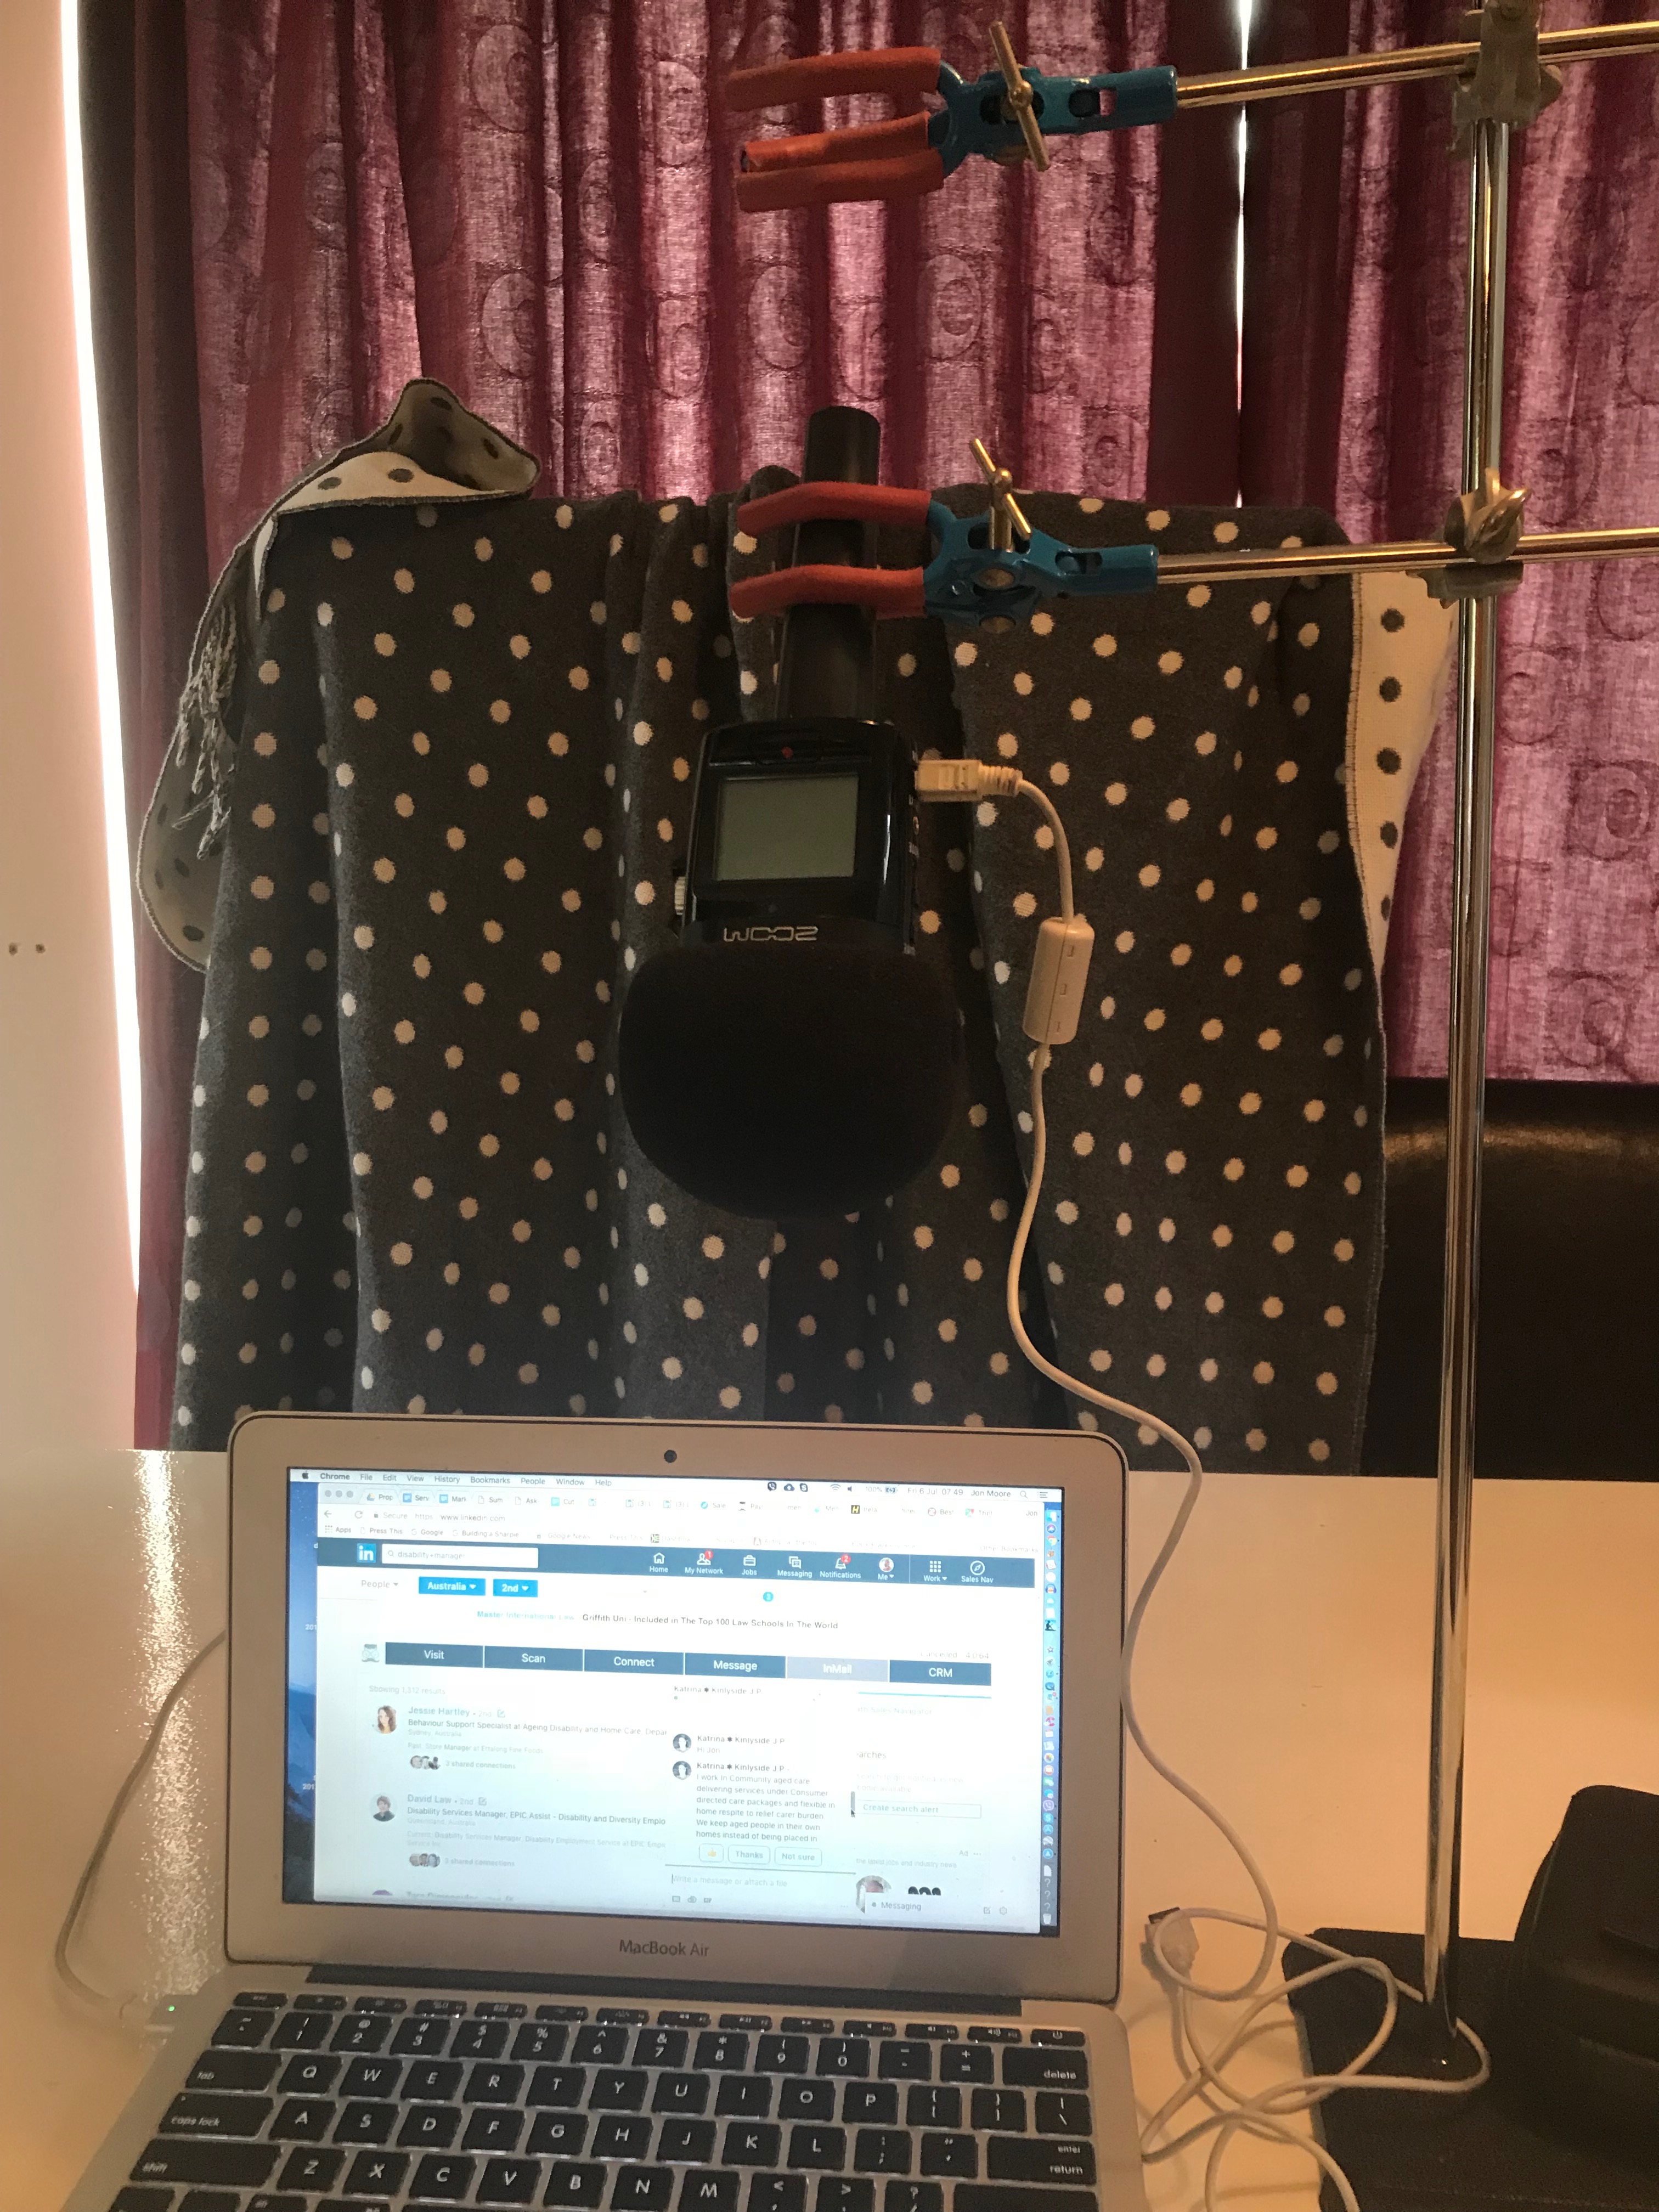
And here’s how the space is modified to improve it.
I’ve moved to face the curtains. These act as a dampener on reflected sounds. But they are too thin to do a good job. So between the table and the curtains, I have a clothes drying rack covered by a heavy throw rug that remains ruffled. No flat reflective surfaces. The mic to the top right of the pic is suspended on an old laboratory stand that keeps it just to the right hand side of my mouth. I’ll cover mic technique in another post.
Sound is picked up by the mic, is absorbed by the throw rug and curtains. By using the Zoom, with the settings I’ve discovered work best for my voice, the quality of the .wav file is more than good enough for what I need.
TAKEAWAYS
- Pick a mic that won’t pick up every sound within twenty leagues.
- Look at your available space and “deaden” reflective surfaces.
- Test to see what does and what doesn’t work
- Record your episodes!
Any questions on this topic? email me: jmpodcastingservices@gmail.com